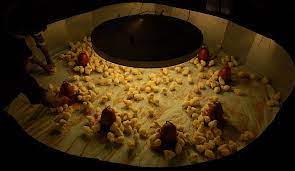
A heat lamp brooder is a device used to provide heat for newly hatched chicks or other poultry birds. It typically consists of a heat lamp with a bulb, a reflector, and a brooder guard to keep the birds from getting too close to the bulb and getting burned.
Here are the steps to set up a heat lamp brooder:
- Choose a safe location: Choose a location that is safe from drafts, predators, and other hazards. The brooder should be placed in a dry, clean, and well-ventilated area.
- Install the heat lamp: Install the heat lamp at one end of the brooder, making sure to secure it in place. The bulb should be about 18 inches above the floor of the brooder.
- Install the reflector: Attach the reflector to the heat lamp to direct the heat downward into the brooder.
- Install the brooder guard: Install the brooder guard around the heat lamp to prevent the chicks from getting too close to the bulb and getting burned. The guard should be at least 18 inches in diameter and made of a material that won’t catch fire.
- Set up the bedding: Spread a layer of bedding material, such as pine shavings or straw, on the floor of the brooder. The bedding should be clean and dry.
- Test the temperature: Use a thermometer to measure the temperature at the level of the chicks. The temperature should be about 95°F (35°C) for the first week and decreased by 5°F (2.8°C) each week until it reaches room temperature.
- Add the chicks: Once the brooder is set up and the temperature is stable, add the chicks to the brooder. Monitor the chicks regularly to ensure that they are comfortable and healthy.
Remember to keep the brooder clean and dry, and provide fresh food and water for the chicks. Also, keep an eye on the temperature and adjust the heat lamp as needed to maintain the right temperature for the chicks.


